This post may contain one or more affiliate product links. Pursuit of Simple is a participant in the Amazon Services LLC Associates Program, an affiliate advertising program designed to provide a means for sites to earn advertising fees by advertising and linking to amazon.com. View my Disclosures to learn more.
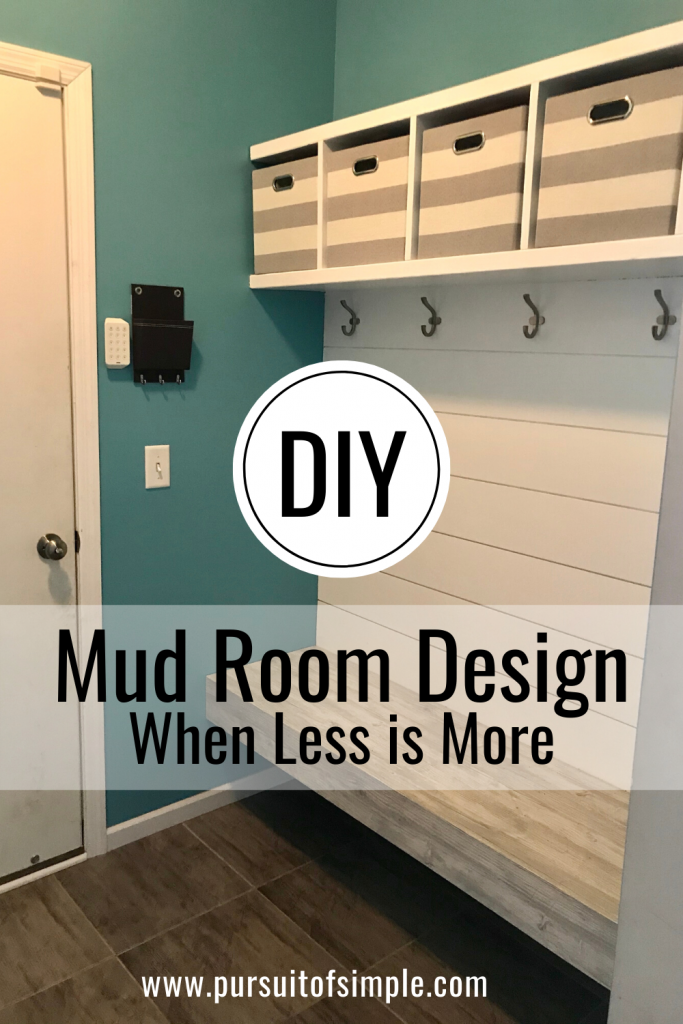
Admittedly, I am not typically a DIY blogger who shares inspiration for home improvement projects… BUT, my husband “recently” finished building our mud room (if I can use that term loosely), and I just have to share! I’m super excited about this project, and here’s why.
First of all, I think he did a phenomenal job, and I am super proud of him, but I also wanted to share our mud room design because I know how helpful it is to see what other people have done. We spent A LOT of time searching Pinterest and the internet for mud room design ideas, so I figure the more ideas that are shared on the interwebs, the better!
And more than just sharing our before and after pictures and giving some basic instructions, I wanted to offer some thoughts (perhaps, lessons learned) for you to consider before you jump into your own mud room project.
First things first. Write out your goals and non-negotiables for the mud room design.
Knowing what you really want to accomplish, as well as being on the same page as your spouse or roommate(s) is key to coming up with a great mud room design. For us, we wanted a bench, a cubby for each family member, and hooks. I was also pretty set on using shiplap simply because it is awesome and always looks amazing.
Recognize your limitations, and work within them rather than force a design.
There are a lot of really beautiful, truly amazing mud room designs out there. You can fall head over heels with a design, but if that particular mud room is twice the size of yours and has a window with natural light flowing in, and your mud room is more like a dark closet (ours), I’m sorry to say, it’s just not going to work.
I’d say this was our biggest hang up when trying to decide on a mud room design. We have six people in our family, and we really wanted each person to have their own cubby. But every time we (by “we” I mean my husband) would do the math, we just couldn’t fit a sixth cubby in our relatively small mud room, no matter how we designed it. Also, we had several additional design elements we were trying to incorporate into the design, but it just wasn’t working.
I finally just surrendered to our constraints and said to my husband, “What if we forget the vertical shelf, just do five cubbies and make the twins share one? Won’t that solve our problem completely?”
Yes. It did.
Once we surrendered, we quickly finalized the design and moved forward with actually starting on the project. An important lesson learned here was that sometimes Less is More. Simplify. We were trying to jam pack too many things into our small space, but once we simplified our design, focused on our non-negotiables, and respected our limitations, we were able to come up with just the right mud room design.
Realize you won’t find the perfect design online, but you can still create the RIGHT mud room design for your space.
Definitely search the internet for ideas, but unless someone has the exact same floor plan and you’re just planning to copy them, you’ll need to come up with your own design that fits your space, taste, and the needs of your family.
Don’t rush the brainstorming and design phase.
Building a mud room, even a small one, is no small project. You don’t want to finish it and then realize you hate the design or it’s not big enough, or the hooks are too high, or whatever. Spend the time on the front end to design something that will meet your needs and be pleasing to your eyes. My husband and I took way more hours planning out the design than I ever thought we would, BUT I am so glad we did because I love the way it turned out. It’s perfect in terms of what we needed and what we were hoping to accomplish.
Make sure to save the designs you like.
Whether you use a spreadsheet, Word doc, or a Pinterest board, find some way to save the designs, pictures, and URLs of the mud rooms that have inspired your design. You might think you’ll remember the blog where you saw it, but after you have sifted through countless designs, it’s easy to forget where you found a certain design. It’s frustrating and wastes your time to look up something twice, so just do yourself a favor and save! It’s possible I’m speaking from experience on this one…
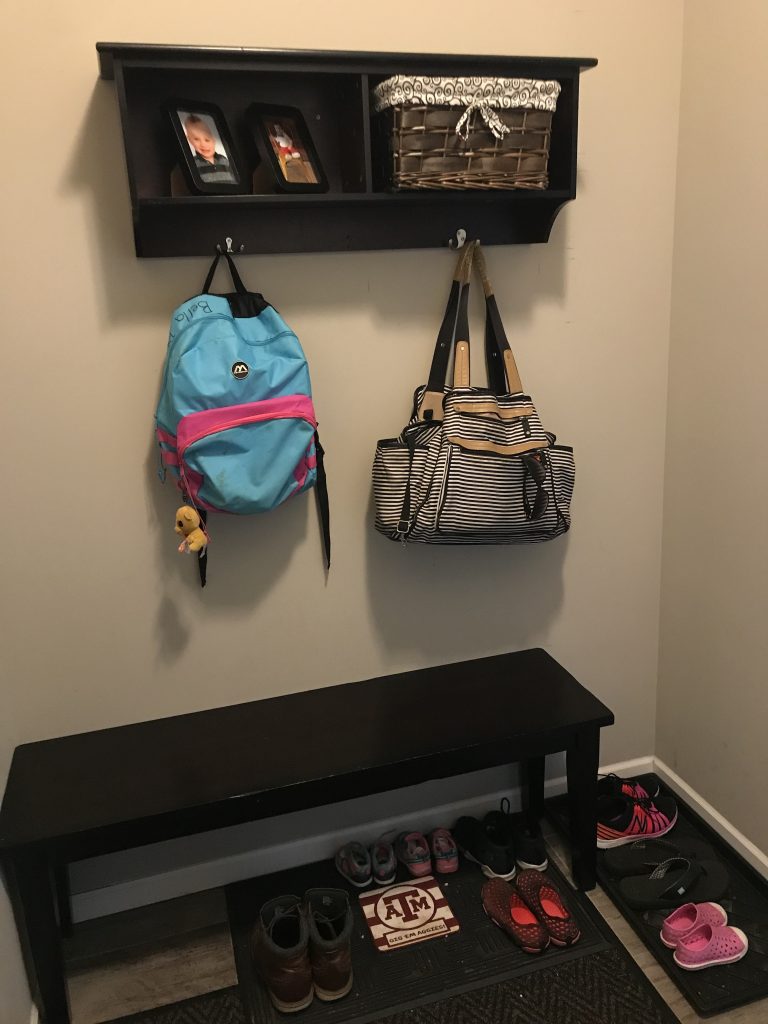
Now for the Practical Side of Things…
Since my engineer hubby was the one who came up with our design and actually built the mud room, I’m going to let him give an overview of what he did to construct our floating bench and cubbies.
Because everyone’s mud rooms are unique in their design and dimensions, we are not including a detailed How To below with exact measurements and materials, but we are happy to share the design plans if you’re interested. Just email us at nicole@pursuitofsimple.com.
Floating Bench and Cubbies Above
Nicole and I both agreed that we didn’t like how the legs of a bench would have to somewhat awkwardly sit on top of our finished floor, so we decided on a floating bench design. We also didn’t want our shoe space to be broken up by cubbies underneath. We thought it looked much cleaner (in terms of design) to have just one big space. And as mentioned before, we settled on five cubbies, which was great since we found some awesome grey and white striped bins on Amazon that fit our space and cubbies PERFECTLY!
Step 1: Make the Bench Frame
This was the hardest part. To start the bench, I built a frame into the studs of the space. I marked the studs, leveled the frame pieces, and drilled them in. Because the side pieces of the frame needed to be drilled into two studs, I slid the back piece of the frame just inside the side pieces. In other words, the back piece did not run the full length of the back wall, but rather the length between the two side pieces.
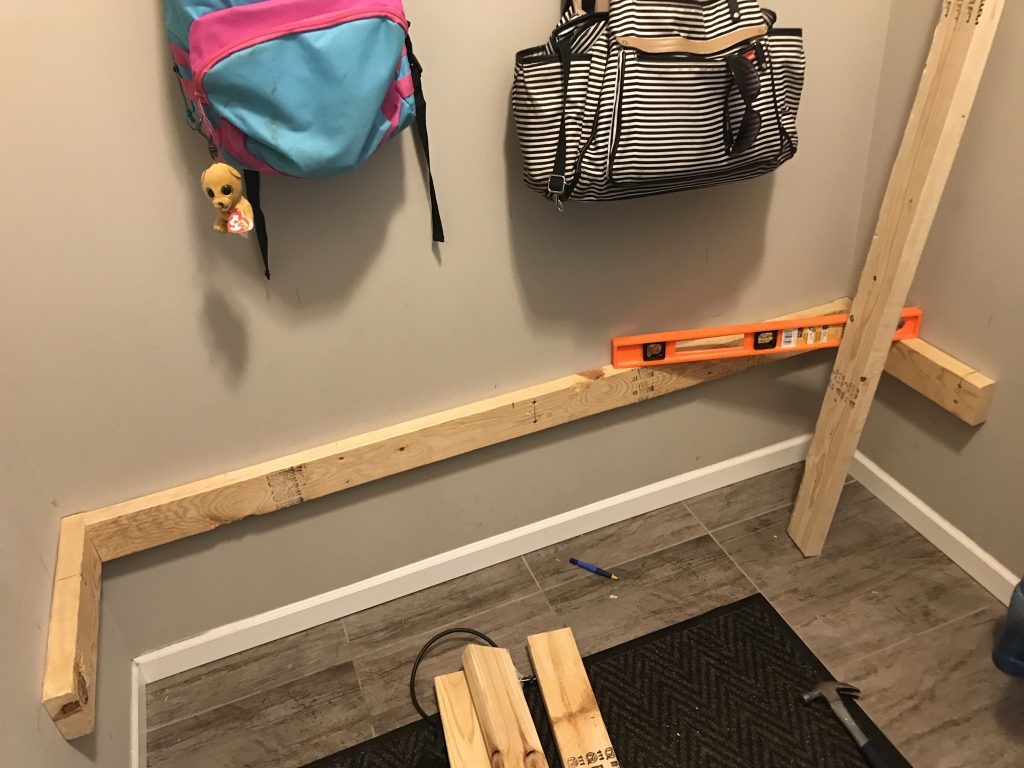
In order to make the bench level and prevent the horizontal braces from twisting when I bolted them to the frame, my plan was to take the back piece of the frame off the wall, temporarily bolt it flush to the front of the side pieces, and then mount the horizontal braces level with countersunk screws. It worked well enough.
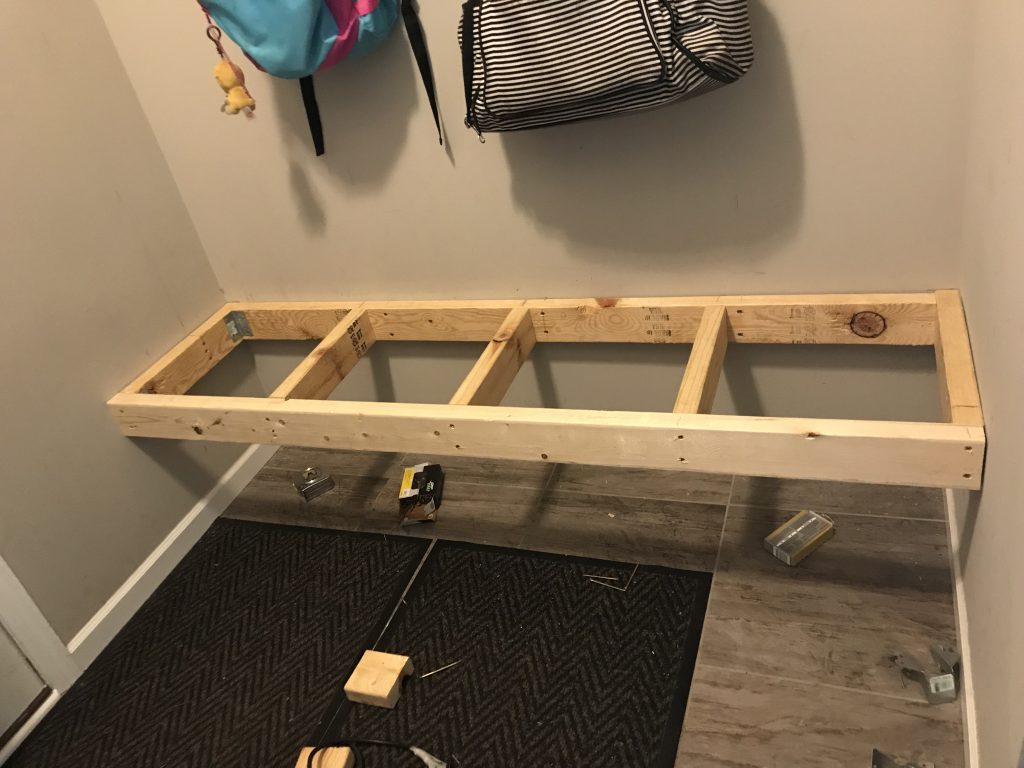
I chose three horizontal braces for a total of five, with the outer two drilled into studs on the wall as previously mentioned. I was then able to flip that piece over (back piece with three protruding braces) and re-bolt it into to the studs in the original holes. Then all I had to do was bolt the front piece on to complete the frame.
Step 2: Make the Benchtop
I also added metal corner braces to the left side of the frame because my stud access was not ideal on that side, causing a bit of an imbalance in the weight distribution. Also, to have a nice and clean, finished look to the bench, I wanted to secure our prefinished boards from below, requiring a sheet of particle board to serve as a support. After the particle board was cut to the width of my bench (thank you neighbor with a table saw!), it was drilled into the frame with countersunk screws.
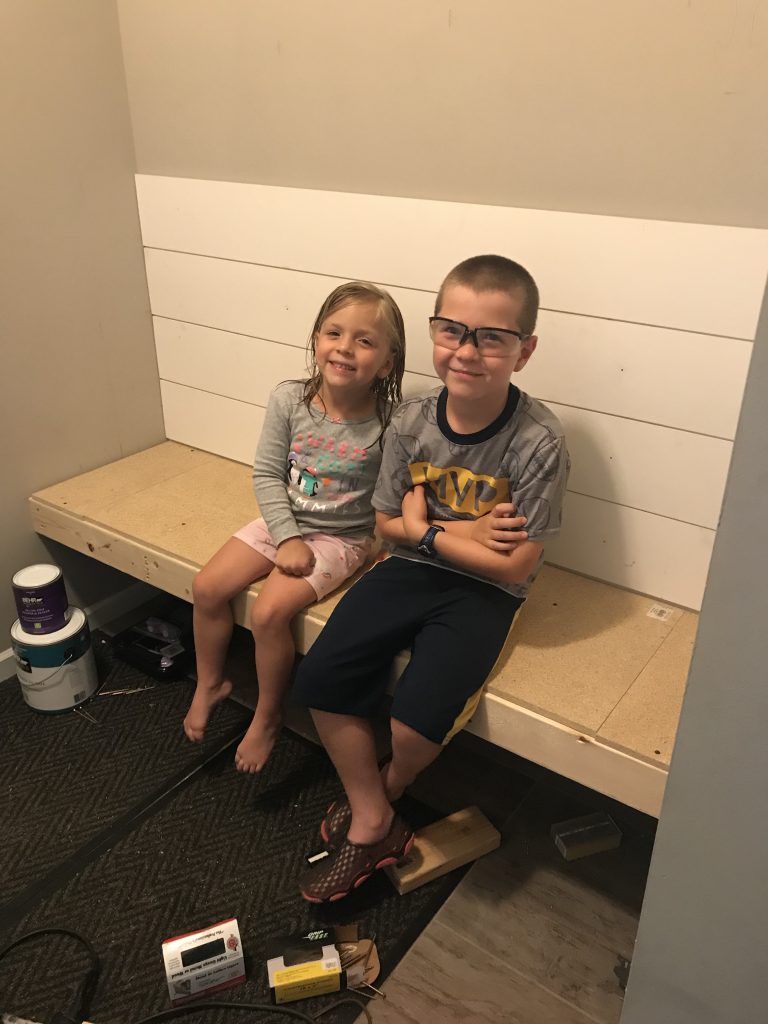
Then, after carefully measuring and cutting precisely to the shape of the wall (which, if you’ve ever worked on wall mounting something in a corner, you know is never square), I secured planks of prefinished boards from underneath. The front board was secured through the front piece of the frame. Be careful to precisely measure material and screw thicknesses to prevent piercing the surface.
Step 3: Make the Shiplap Wall
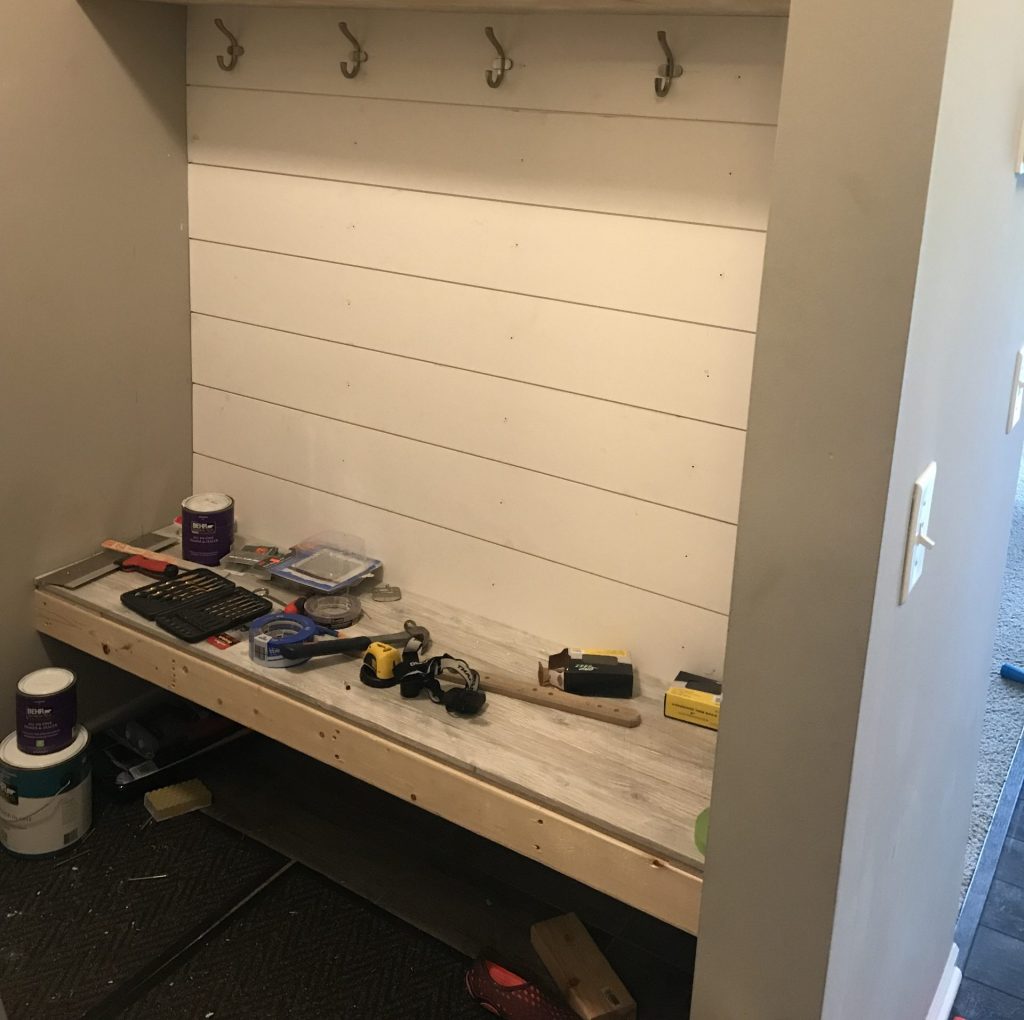
Before I secured the prefinished boards, I began making the shiplap wall because I knew I was going to be painting the planks, and I didn’t want to have to tape the bench in order to paint. Mounting the shiplap was pretty straight forward once the first one was in place, and I started from the bench and worked my way up.
And because I planned to nail the shiplap into the studs, I made sure to locate and clearly mark the studs on the wall prior to hanging. After getting the first one in place, I slid the next one in and then nailed the first one down. This allowed for some wiggle room and helped slide the lip of the board in behind the one below.
I repeated this process for each piece until I got to the final shiplap, which was the most difficult. Fortunately, I had bought an extra one, because, yeah… I made a mistake.
It was the most difficult because I wanted the hooks, much like the bench top, to have a clean, finished look, so I chose hooks from a pre-finished hook rack. The screws on these racks are typically screwed in from the back, which leaves a nice, screw-free look – exactly what I wanted. As a result, I had to mount these hooks before hanging the final piece of shiplap they were attached to.
Step 4: Make and Mount the Shelf
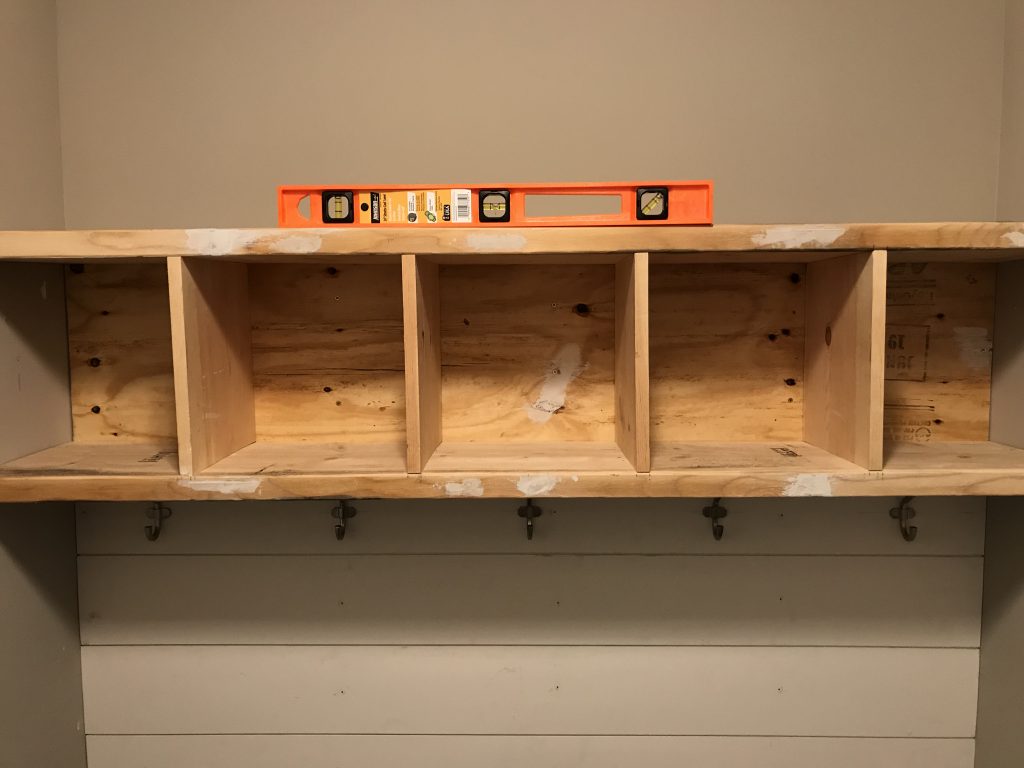
Once the shiplap wall was complete, I moved on to the shelf. To keep costs low, I chose a piece of 2 x 12 for the tops and bottom (NOT MDF), light plywood board (NOT MDF) for the backing, and 1 x 12 for the skinny separator pieces. While I could have gone with MDF, the kind typically used for shelves, this one was going to span the entire mud room, and I knew our kids would eventually pull down on it or load up the bins with junk. This would eventually cause the shelf to sag, or worse, fail and fall over. So, to pull it off with no screws showing, I built it on (level) ground and then brought it inside to hang.
I measured and pre-drilled holes in the plywood backing that lined up with my studs in the wall. Then I drilled the shelf into the wall while my wife held it in place. These three screws (along with nails in the ship lap) were the only fasteners that required using filling and sanding. I also filled and sanded any visible rough spots in the shelf.
Step 5: Finalize, Paint, and Organize!
Once the shelf and shiplap were complete, it was time for the fun part – tie in the prefinished boards, paint the shelf and walls, and organize the bins! I couldn’t wait to paint and finish the project, but I had to wait on my wife, and she takes FOREVER to pick out paint colors! Needless to say, she finally picked out a color. I painted, and with much joy, she completely reorganized our new mud room and all our new bins.
We have been enjoying our completed mud room for about nine months now, and it has been exactly what we needed and wanted. Although tailor-made for our space, it was inspired by so many awesome ideas we found online. We love the simple design. And as she mentioned before, we learned that sometimes, as in our case, less is more!
Hopefully you are feeling inspired and encouraged to begin your own mud room project. Good luck!

Leave a Reply